Overview
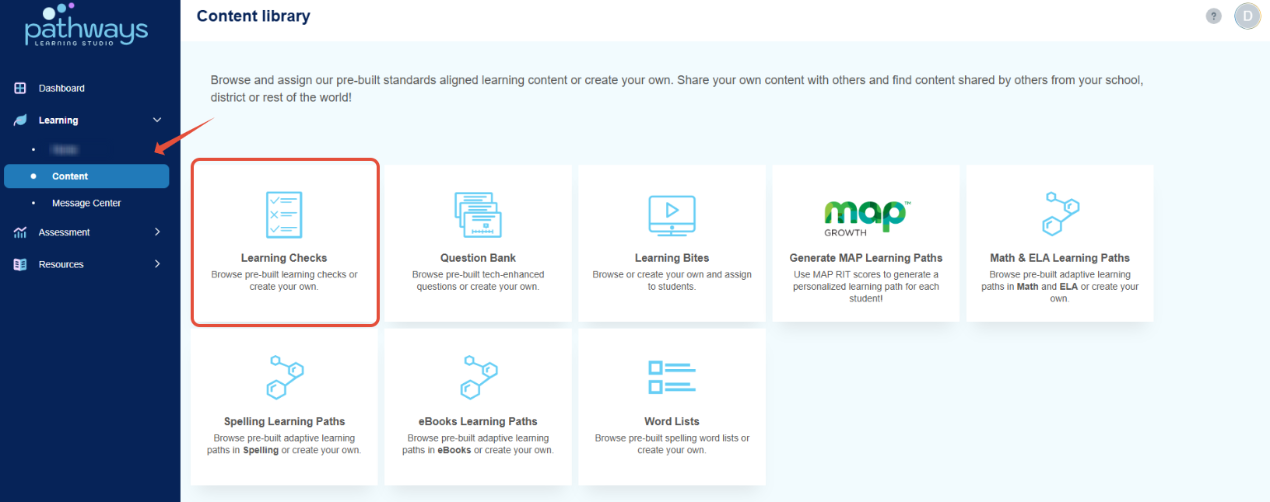
This article walks teachers through how to create and assign Learning Paths to students. Each of the actions we will discuss can be found in the Learning Check tile under Content as shown below.
Steps to Follow
- Select Content under the Learning module from the dashboard and then the Math & ELA Learning Paths tile.
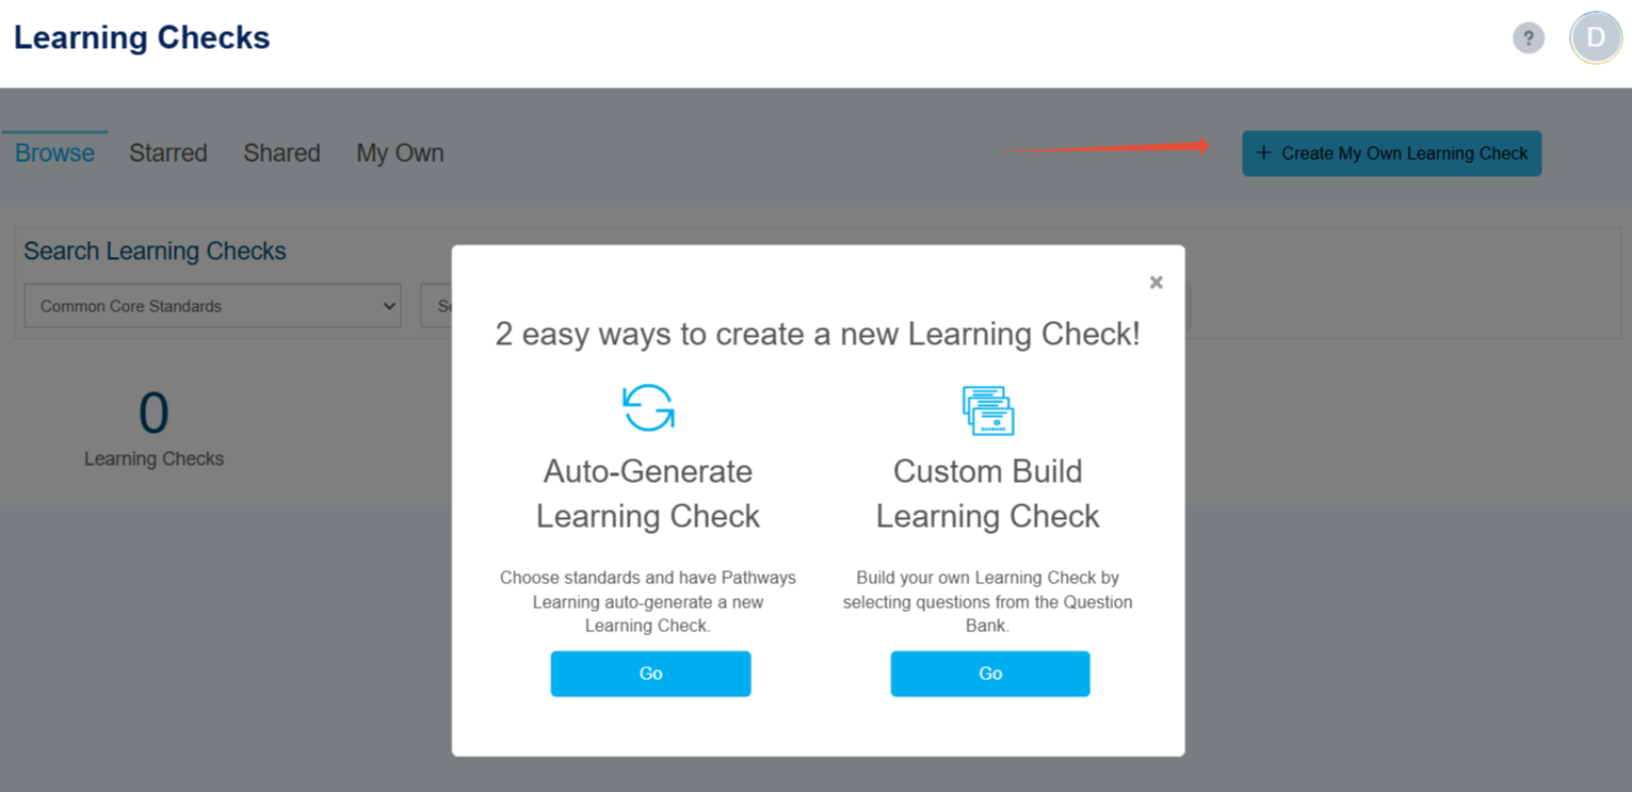
- Click the button to create a new Learning Check. Let's explore both options.
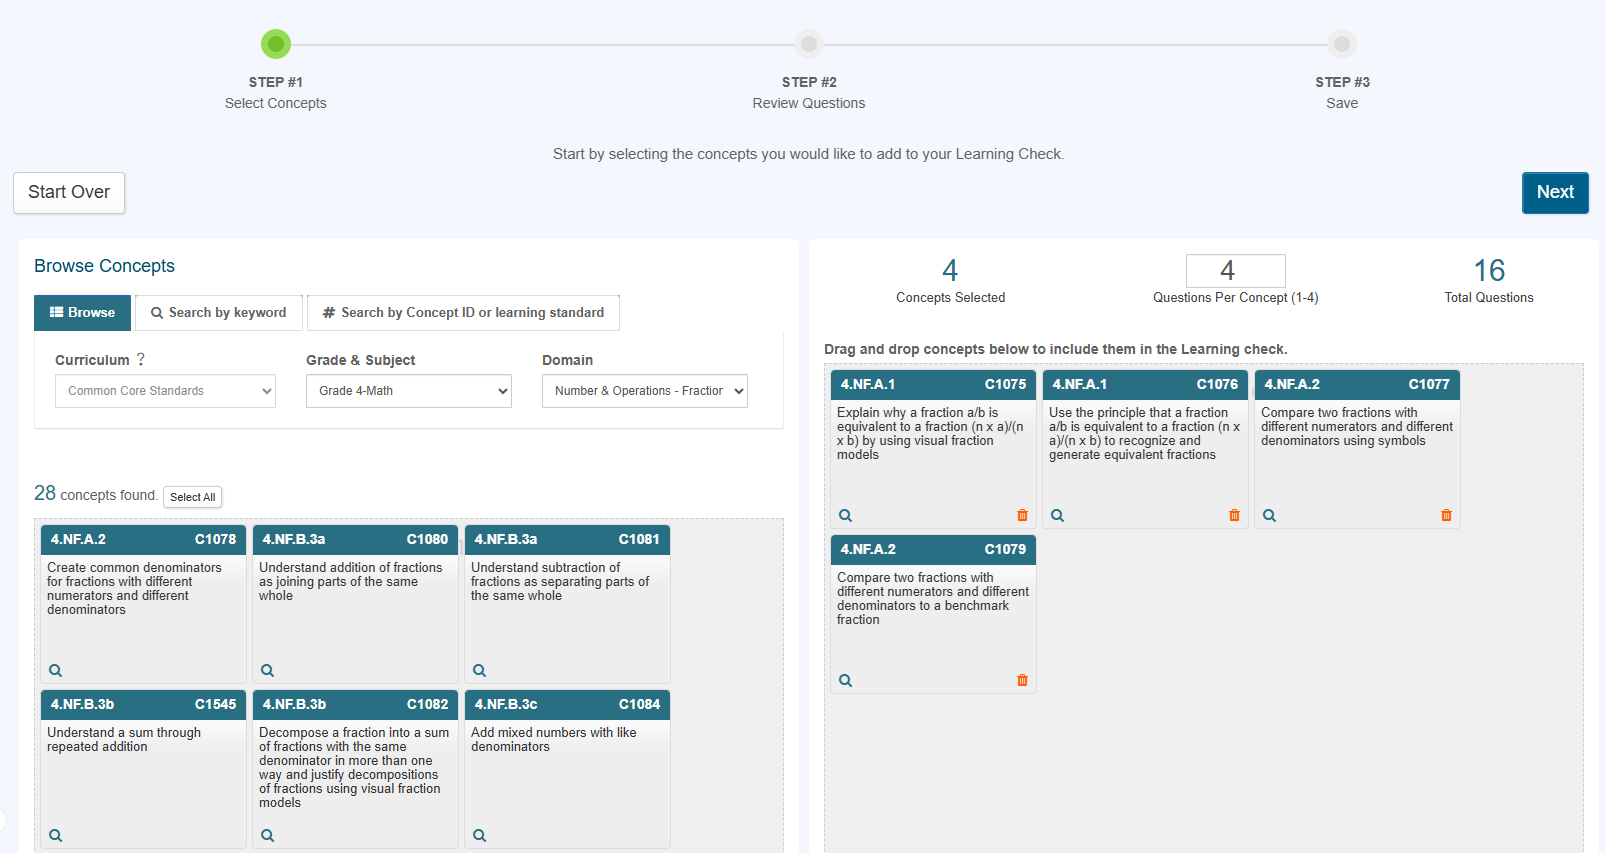
- Auto-generate: Browse the concepts and then drag and drop them to be included in the Learning Check. Note: This option works well if one is short on time and would like to create a quick quiz.
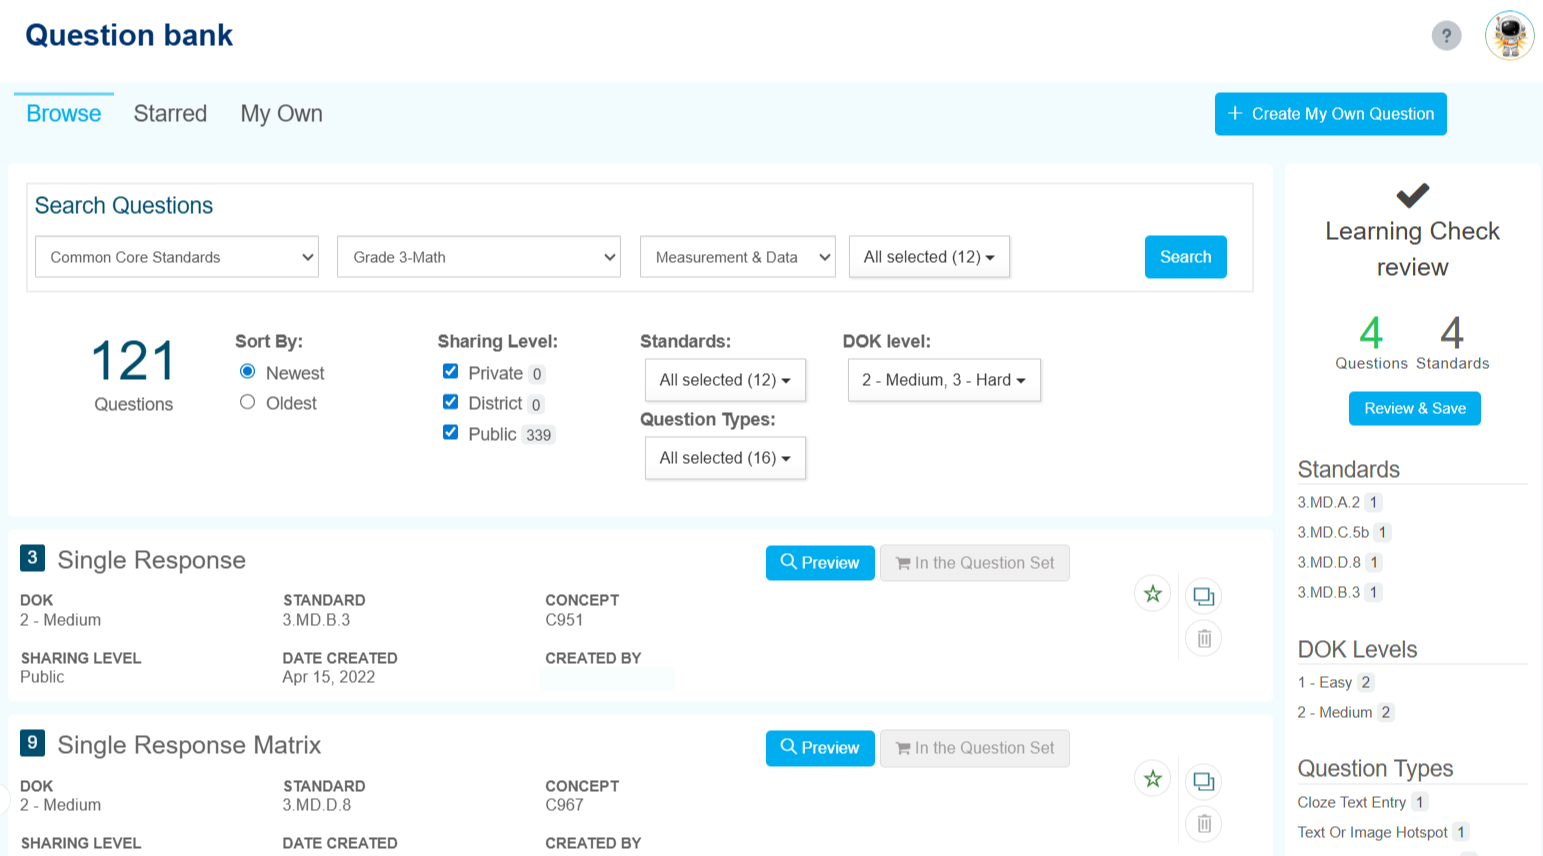
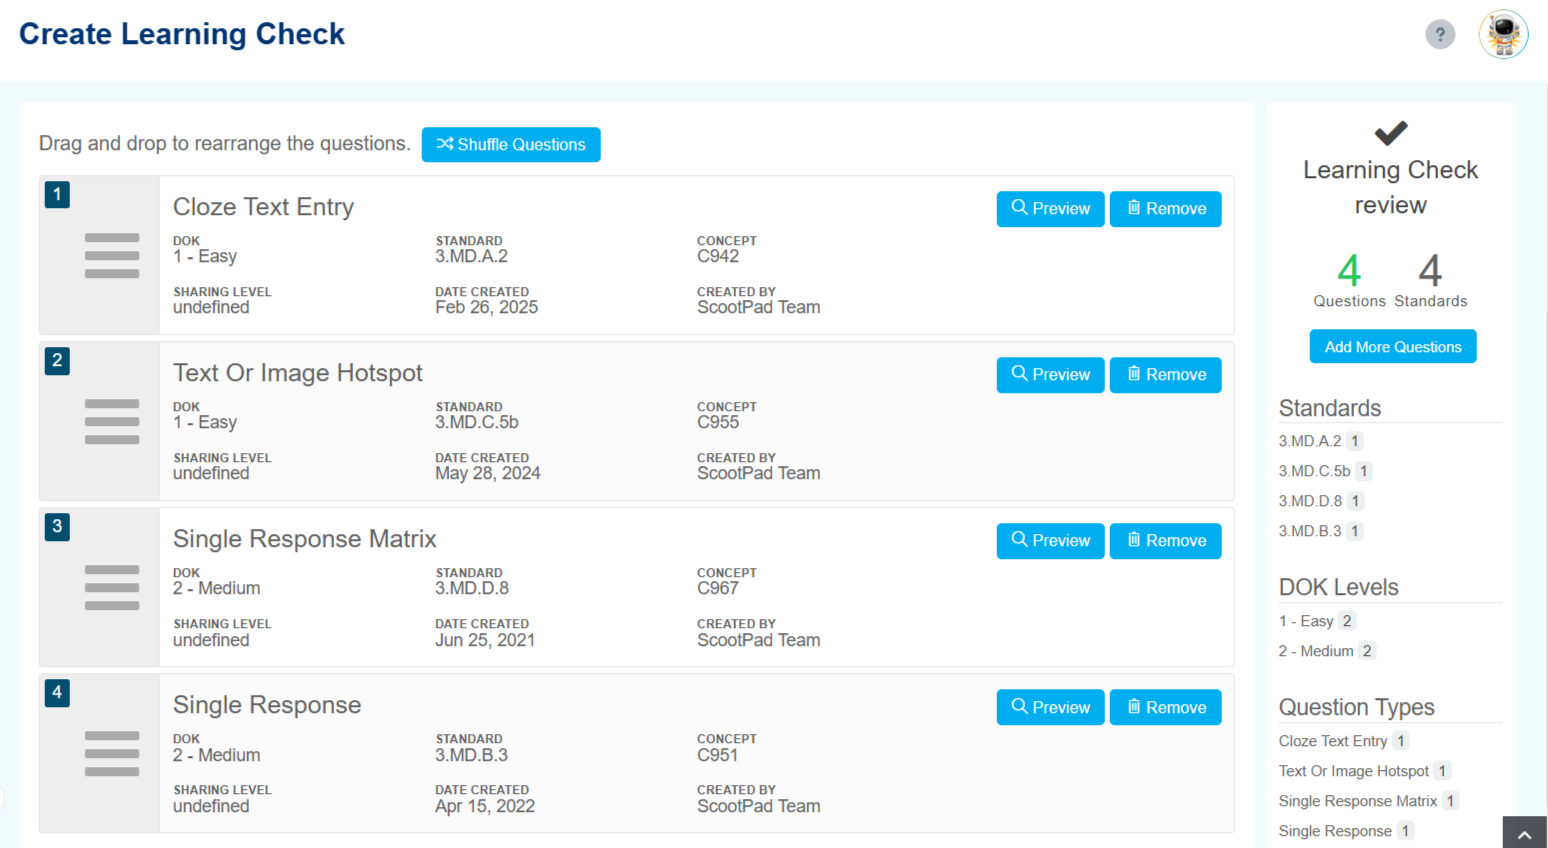
- Custom build: Search Questions, then narrow down by Standards, Question Types, and DOK level. You can also preview individual questions, create your own question, or review the entire Learning Check before Adding to the Question Set and clicking Review and Save. Note: This option is great when one wants to be more selective and choose the specific questions that will be on the quiz.
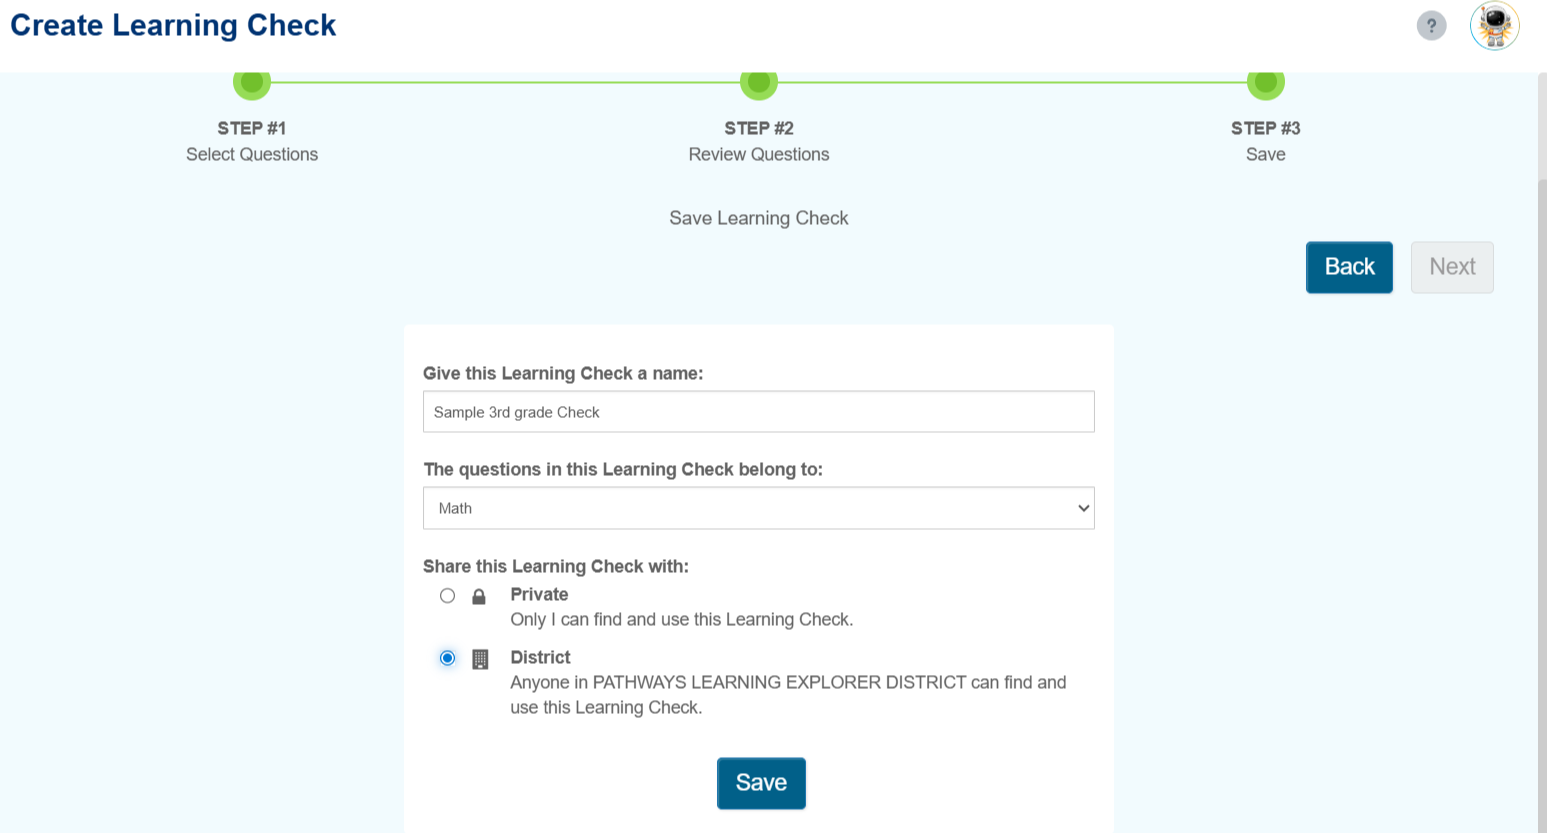
- Save the Learning Check and choose to share it with others.
- The teacher can always return to the Content Library, locate the Learning Check and perform specific actions. When it is shared, others can perform the same actions except edit it.

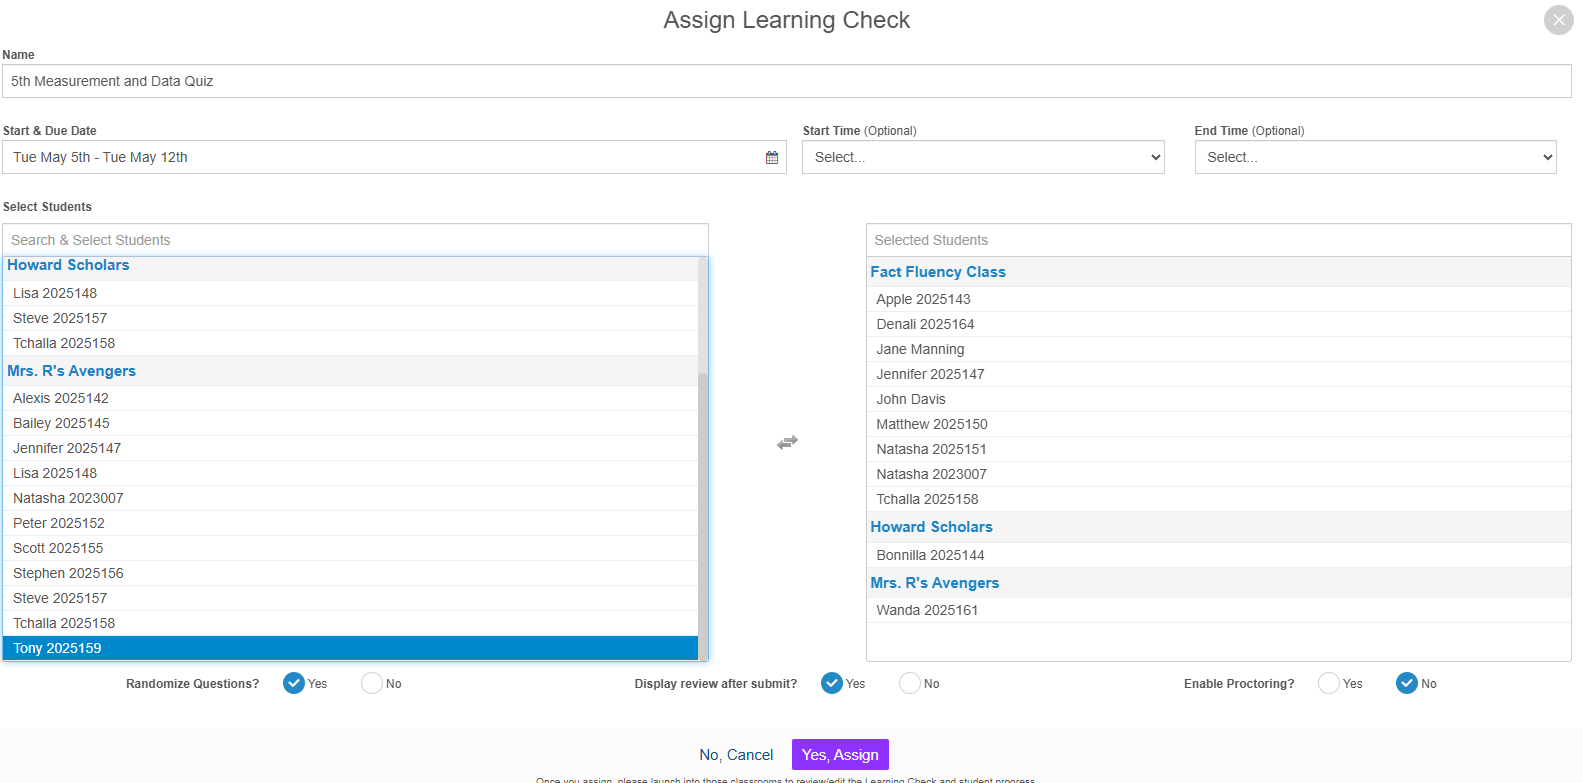
- To assign the Learning Check to several classrooms at once, the teacher can select the assign button in the previous image. In the window, a list of all of the teacher's classrooms will be listed on the left-hand side. Select the classroom's name to assign the task to the entire classroom or select specific students.
- Name-This is the name given to this instance of the Learning Check. Ex. Assign it as an entry ticket and then come back and assign it as an exit ticket.
- Start and due date- This is the window of time the Learning Check will be available to students.
- Optional start and end time-This allows more granularity where the teacher can state the times the Learning Check will be viewable for students. Ex. Between 10 and 2 so that students don't see it at home.
- Select students- Teachers can assign a Learning Check to one or more of their classrooms and individual students.
- Randomize questions- This ensures that students do not see the questions in the same order.
- Display review after submit-This controls if students see their results after it has been completed.
- Enable proctoring- Proctoring is another level that can be enabled so that the Learning Check is only available when authorized.
Related Resources
Was this article helpful?
That’s Great!
Thank you for your feedback
Sorry! We couldn't be helpful
Thank you for your feedback
Feedback sent
We appreciate your effort and will try to fix the article